
Showing posts with label saiunkoku. Show all posts
Showing posts with label saiunkoku. Show all posts
Monday, March 16, 2009
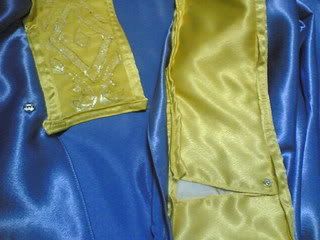
i spent 2 whole days trying to sew all the seqiuns on ryuuki... yes i'm repairing costumes again. expecting a photoshoot to come up soon for this one but it seems that i'm only making it look worse. goooosh, whatever. as long as the pattern looks much more obvious than it does previously...
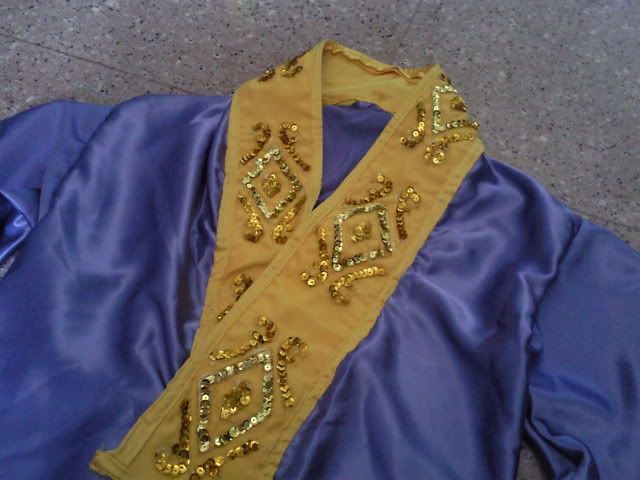
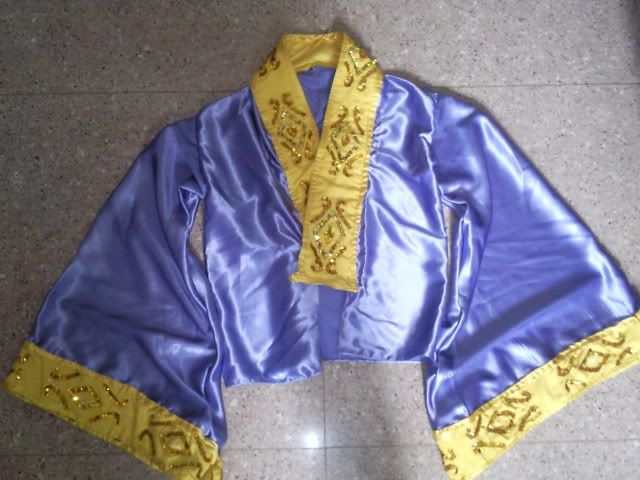
oh and i think i haven't post the head dress one where i repaired the flailing stick behind. so now it looks straight with hard wires inside.


oh and i think i haven't post the head dress one where i repaired the flailing stick behind. so now it looks straight with hard wires inside.

Monday, January 05, 2009
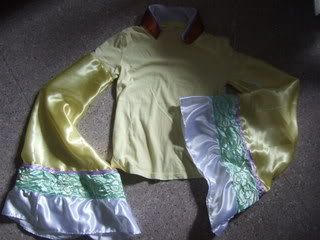
following that i started on my sakujun.
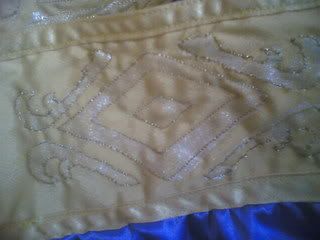
making it according to the novel version is a pain because there's so many flowery embroidery details. i hate working with my golden thread cos it snaps so easily but i like embroidery.
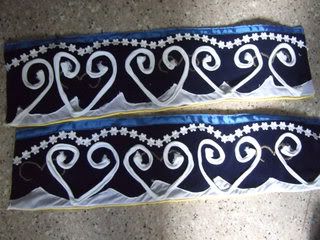
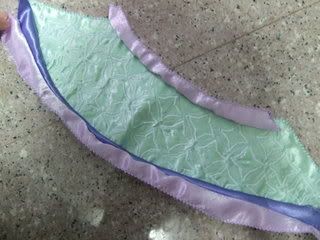
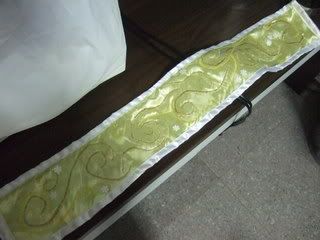
anyways i did the embroidery parts first (sleeves tip)
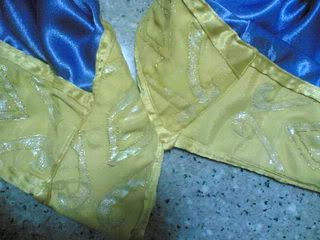
then the sleeves head embroidery
had to sew yellow backing for it so it doesn't look too messy from the back xp
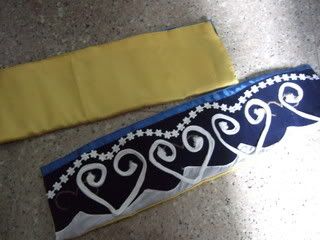
then i attach the tip detail to the sleeves
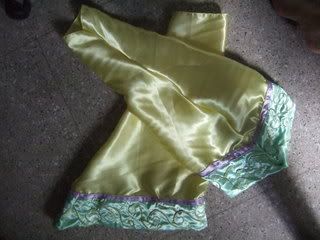
and the sleeves head to the blue top i made

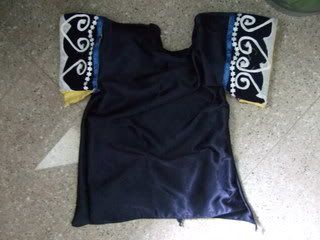
and i attached the sleeves to some yellow shirt i bought off the auctions very very long ago and sewed the collar on.
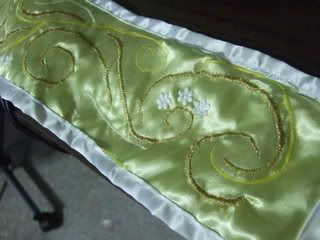
here's the embroidery for the front panel
and then it's attached to the top
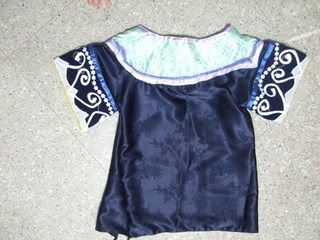
i actually unsewed that front panel and resewed it THRICE because the first time it was resewed i couldn't get it through my head (-_-`) then the second time those add-ons at the side bothered me a lot and i had to put a backing to the panel before resewing it again. does the final piece look different?
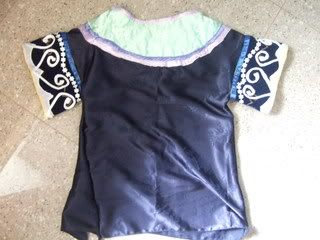
with the added jewels

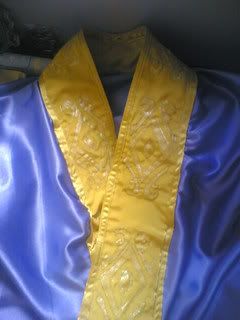
and the inside of the collar
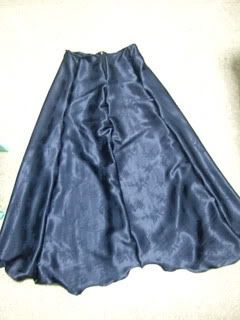
and finally my skirt
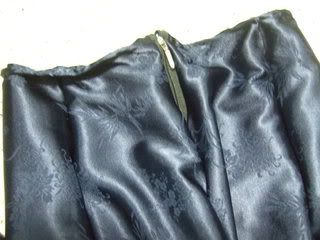
zip on the back
and i made the loincloth last (whatever you call it, that long piece in front of the skirt)
making it according to the novel version is a pain because there's so many flowery embroidery details. i hate working with my golden thread cos it snaps so easily but i like embroidery.
anyways i did the embroidery parts first (sleeves tip)

then the sleeves head embroidery

had to sew yellow backing for it so it doesn't look too messy from the back xp

then i attach the tip detail to the sleeves

and the sleeves head to the blue top i made


and i attached the sleeves to some yellow shirt i bought off the auctions very very long ago and sewed the collar on.

here's the embroidery for the front panel

and then it's attached to the top

i actually unsewed that front panel and resewed it THRICE because the first time it was resewed i couldn't get it through my head (-_-`) then the second time those add-ons at the side bothered me a lot and i had to put a backing to the panel before resewing it again. does the final piece look different?

with the added jewels


and the inside of the collar

and finally my skirt

zip on the back

and i made the loincloth last (whatever you call it, that long piece in front of the skirt)


Saturday, January 03, 2009
shi ryuuki (saiunkoku) shopping list
for the cloths
light lilac: $3.50/m x 2.5 = $9 (rounded off)
medium purple satin: $4/m x 2 = $8
lilac satin: $3.50/m x 1 = $3.50 (i lost my sample and ended up buying the wrong color. gosh)
purple satin (the correct one): $4/m x 1.5 = $5 (rounded off, last half metres anyway)
darkest purple hard satin: $4/m x 1 = $4
white satin: $4/m x 1 = $4
white hard satin: $4/m x 1 = $4 (yes, bought the wrong satin. wth. always bring your samples...)
lining: $1.50/m x 3 = $4.50
dark blue satin: $4/m x 1 = $4 (got extra for this cos it was leftovers haha)
red velvet: $2.50 x 1 = $2.50
yellow satin: $3/m x 2 = $6
green satin: $4/m x 0.5 = $2
brown satin: $4/m x 0.5 = $2
total: $59.50
accessories
gold ribbon: $5.90/roll
crystal teardrops: $3.90/ 6 drops
purple diamante: $3.50/ 6 diamantes
gold buckle: $1.50/piece
silver rope: $2.50/m x 2 = $5
threads (various colours): $0.70 x 12 -$0.50 discount = $7.90
gold sequins: $0.80*4packets = $3.20 (with one packet free!)
total: $30.90
others
fabric paint (pearlescent yellow): $4.70 x 2 = $9.40
grease paper: $1.20
inner fabric paper (for collars, etc): $1/m x 1 = $1
vaseline paper (for tearing off after embroidery): $8.95/m x 1 = $8.95
blonde zephyr wig: 3800yen/65=$58.50
hazel encore lens: $18
total: $97.05
grand total: $59.50 + $30.90 +$97.05 = $187.45
reflections/lessons learnt
whee! so i started shopping around in arab street with my sister for the first day and spent a BOMB. the next day i realised i had a lack of colored threads so i went to the craft shop inn amk. following that, i went to arab street again the next day to shop for the shortages.
and man. cosplay is really expensive.
and yeah, i've hit the $100 mark. anyway i think i still have some more cloth to buy for the clouds. sighss.
very very happy to have discovered the hard paper to put inside for my collar and pattern embroidery.
golden thread should be used singularly for sewing, it was disastrous since it kept getting snipped off, though triple threads would show the pattern clearly (compare collar to sleeves)
fabric is important in relation to the character (this was a kingly character, so i selected satin and velvet)
to make it as exact as possible, i did the inner and outwear even though i could have attached the extra layers to the outer wear easily. but you can reuse this kinda things so it's ok! it's like detailing down to things you don't see.
i underestimated a lot of stuff this time and had to pay for it with extra trips to arab, extra seam sewing, resewing, attachments, etc, which is NOT worth the effort if i could measure correctly in the first place.
sa sakujun (saiunkoku)shopping list
pink zephyr wig: 3800yen/65 = $58.50
jade green satin: 1.5m x $2.50 = $3 (got some discount)
light yellow satin: 2m x $2 = $4
navy brocade: 2m x $10 = $20
blue teardrop jewels: $2
orange round iron-on jewels: $2 (8pcs)
orange swarovski round jewels: $5 (8pcs)
pink eyeliner: $2.50
purple pink diamante: $1.90/2pcs
total: $98.90
Monday, November 24, 2008
following yasuaki is sakujun from saiunkoku monogatari. will be doing the novel version though! there's already 1 japanese who has done it so i'm more or less going to take her as an example since there ain't a lot of pictures on sakujun of the novel version.


my favourite video dedicated to this mad, but supremely charming and gorgeous man <3
and some pictures of him (fanart, though)


this is picture from the novel


my favourite video dedicated to this mad, but supremely charming and gorgeous man <3
and some pictures of him (fanart, though)


this is picture from the novel

Monday, March 24, 2008
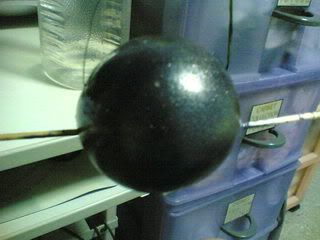
oki, stupid ball ball which i've repainted with acrylic (mix of pink and blue), then coated it with some translucent silver spray, and finally a shiny coat (forgot what it is called but it makes things shiny... duh). by the way spray paint FAILS on rubbery surface. it broke into pieces when i squeezed the ball. before the shiny coating, it looks black:
but after that, it looks bluish!
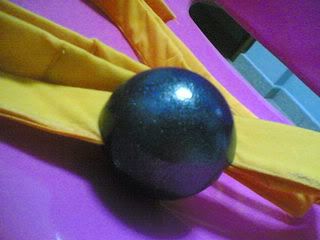
and with the straps. still can't figure out how to hook the straps...
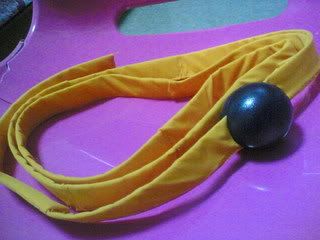
and yes after washing, spraying and painting, the lighted thing inside still works. :D

but after that, it looks bluish!

and with the straps. still can't figure out how to hook the straps...

and yes after washing, spraying and painting, the lighted thing inside still works. :D
Tuesday, March 18, 2008
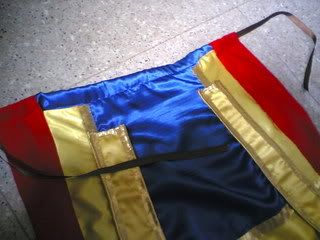
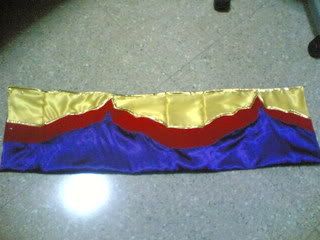
the front flannel was a pain. the clouds were a pain. see how they crumple up after i've sewed them on? i used my grease paper to set the patterns, then sew over the paper and tore it out. it works pretty well, but it got stuck when i did the outlines. still, it's so much cheaper than the vaseline paper...
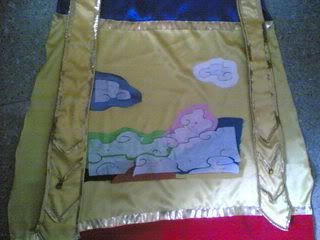

and then i've to add the yellow and red extensions at the sides after i've taken more snapshots from the anime.
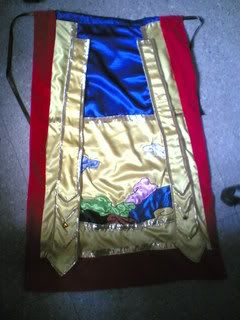
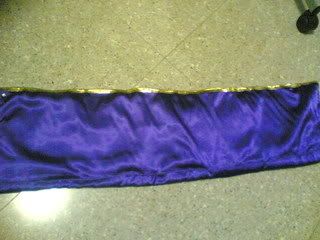
and the back is neater with a huge red flap. luckily i was forced to buy a metre of this cloth.
added a drawstring ribbon to tie it around my waist easily.
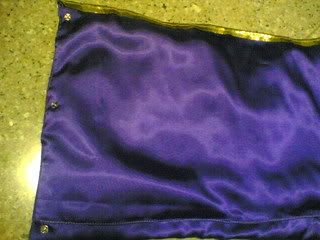
having done this, i went on to sew extra buttons for my top, the obi and fixed all the ugly parts behind the gold strips and inside the top... also added strongs to tie my headgear.
and i realised i was quite done. so i'm left with the ball-y. and i got this rubber ball-y which lights up when you bounce it.
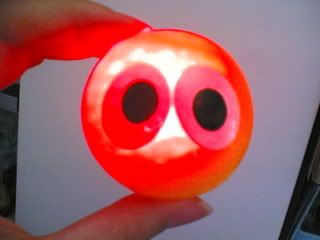
ain't it cute. well i tried to spray paint it but it flaked off after i squeezed it. so oh well. gotta find another ball, or another way.


and then i've to add the yellow and red extensions at the sides after i've taken more snapshots from the anime.

and the back is neater with a huge red flap. luckily i was forced to buy a metre of this cloth.

added a drawstring ribbon to tie it around my waist easily.

having done this, i went on to sew extra buttons for my top, the obi and fixed all the ugly parts behind the gold strips and inside the top... also added strongs to tie my headgear.

and i realised i was quite done. so i'm left with the ball-y. and i got this rubber ball-y which lights up when you bounce it.

ain't it cute. well i tried to spray paint it but it flaked off after i squeezed it. so oh well. gotta find another ball, or another way.
Wednesday, March 12, 2008
i'm so so excited! forgot to bring my handphone yesterday but i remembered today so here's one hoard of pictures for me to boast haha!
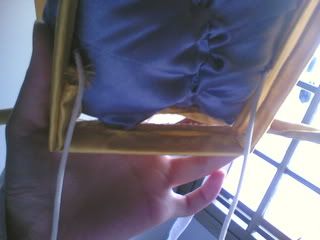
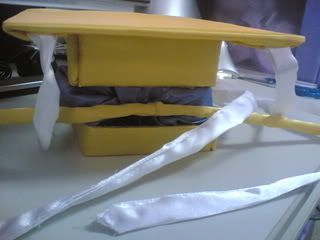
monday was so fruitful. i started my day working on the emperor headgear using corrugated board and cloth. here's what i have! now i'm just thinking of what strongs i should stick to it so i can really wear it...
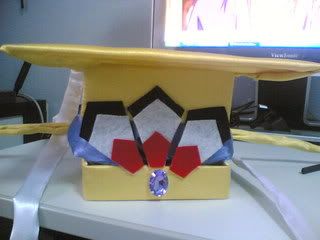
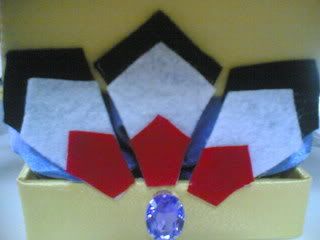
and the back. maybe i will replace the yellow stick. looks awful.
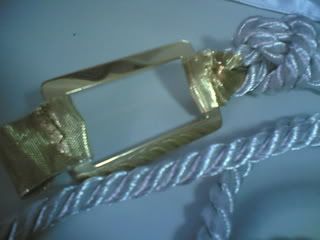
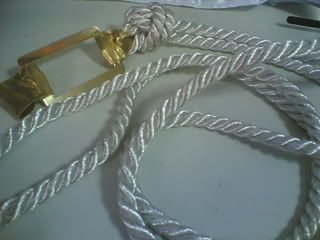
then i worked on the belt. managed to snip the center section off with a plier and tie it with gold ribbons. yay!
and yes! my pretty top!
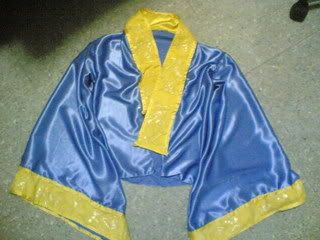
managed to sew on the embroidery piece to the collar:
and the sleeves.
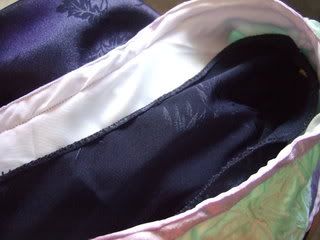
it looks easy but because my estimation wasn't accurate and the cloth kept getting flopped (whatever that means), i had to unsew and resew a couple of time so it won't look so scrunged. and of cos, adding the buttons. the back of the lining looks horrible. maybe i'll treat it as a pocket.
then i went to fix my horribly underestimated obi by addding extensions. it looks pretty good now. i realised the underside is stitched on by the bobbin color, so you could actually have 2 different color on the front and back. stupid me, should have used it for my top. the troublesome part was changing the colors.
and i realised it was so messy (the back) so i had to cover it up. heh.
the last step was just adding buttons to it.

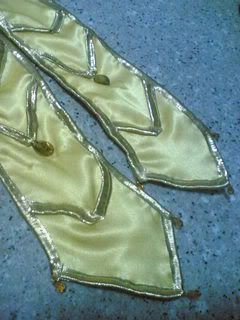
yesterday, i worked on the 2 golden strips. i had a horrible time unsewing ALL the gold lining at the side and sewing them again. this time, i unsewed it whenever the cloth flipped at the back or the layers doesn't sew well together. spent about 3+ hours just sewing the sides.
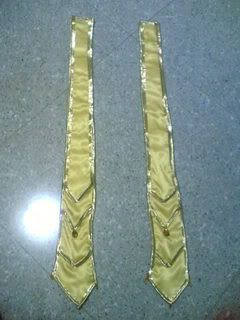
the back.
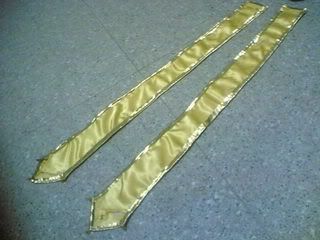
the tip of the back, which looks really awful because i underestimated the triangle section and the length.
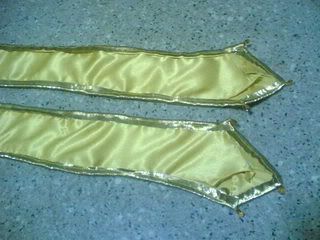
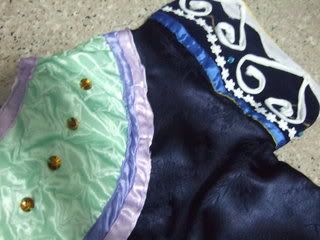
and my swarovski crystals on it! pretty!
monday was so fruitful. i started my day working on the emperor headgear using corrugated board and cloth. here's what i have! now i'm just thinking of what strongs i should stick to it so i can really wear it...


and the back. maybe i will replace the yellow stick. looks awful.

then i worked on the belt. managed to snip the center section off with a plier and tie it with gold ribbons. yay!


and yes! my pretty top!

managed to sew on the embroidery piece to the collar:


and the sleeves.

it looks easy but because my estimation wasn't accurate and the cloth kept getting flopped (whatever that means), i had to unsew and resew a couple of time so it won't look so scrunged. and of cos, adding the buttons. the back of the lining looks horrible. maybe i'll treat it as a pocket.

then i went to fix my horribly underestimated obi by addding extensions. it looks pretty good now. i realised the underside is stitched on by the bobbin color, so you could actually have 2 different color on the front and back. stupid me, should have used it for my top. the troublesome part was changing the colors.

and i realised it was so messy (the back) so i had to cover it up. heh.

the last step was just adding buttons to it.


yesterday, i worked on the 2 golden strips. i had a horrible time unsewing ALL the gold lining at the side and sewing them again. this time, i unsewed it whenever the cloth flipped at the back or the layers doesn't sew well together. spent about 3+ hours just sewing the sides.

the back.

the tip of the back, which looks really awful because i underestimated the triangle section and the length.

and my swarovski crystals on it! pretty!
