Tuesday, March 18, 2008

with my ryuuki almost done, i used the scrap cloths to make random things... like a handphone pouch. i think the purple satins match quite nicely.


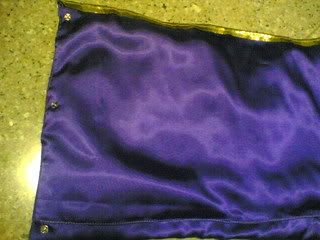
i've even embroidered a little b at the corner. that is quite ugly... oh well, here's the back.


i've even used white lining for the inner parts...


and i really want to make a handphone couch for my boss's birthday. i wonder if this is passable. i think it would really make him laugh. ughhh.


don't ask me what animal it is ok. for an even more cutesy effect, here are its legs.


and of cos the holder part. and the handphone can only be placed sideways so the holder will remain steady. bad physics. ah well.


the front flannel was a pain. the clouds were a pain. see how they crumple up after i've sewed them on? i used my grease paper to set the patterns, then sew over the paper and tore it out. it works pretty well, but it got stuck when i did the outlines. still, it's so much cheaper than the vaseline paper...


Photobucket


Photobucket


and then i've to add the yellow and red extensions at the sides after i've taken more snapshots from the anime.


Photobucket


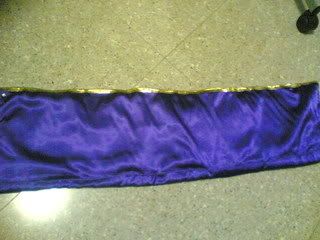
and the back is neater with a huge red flap. luckily i was forced to buy a metre of this cloth.


Photobucket


added a drawstring ribbon to tie it around my waist easily.


Photobucket


having done this, i went on to sew extra buttons for my top, the obi and fixed all the ugly parts behind the gold strips and inside the top... also added strongs to tie my headgear.


Photobucket


and i realised i was quite done. so i'm left with the ball-y. and i got this rubber ball-y which lights up when you bounce it.


Photobucket


ain't it cute. well i tried to spray paint it but it flaked off after i squeezed it. so oh well. gotta find another ball, or another way.

Wednesday, March 12, 2008

someone is forming a group in the forum... and i managed to grab these pictures.
Photobucket
Photobucket
PhotobucketPhotobucket


their character designs are really nice!
i'm so so excited! forgot to bring my handphone yesterday but i remembered today so here's one hoard of pictures for me to boast haha!
monday was so fruitful. i started my day working on the emperor headgear using corrugated board and cloth. here's what i have! now i'm just thinking of what strongs i should stick to it so i can really wear it...
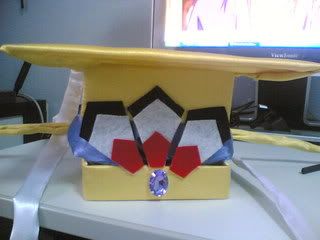
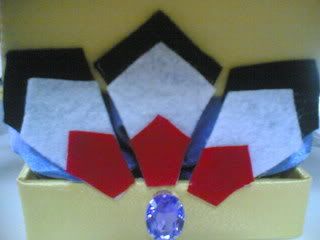
Photobucket


Photobucket


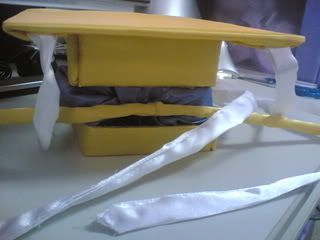
and the back. maybe i will replace the yellow stick. looks awful.

Photobucket


then i worked on the belt. managed to snip the center section off with a plier and tie it with gold ribbons. yay!
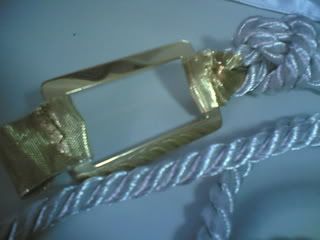
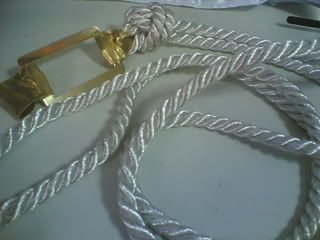
Photobucket


Photobucket


and yes! my pretty top!


Photobucket


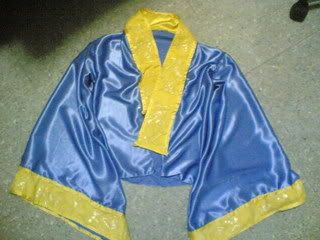
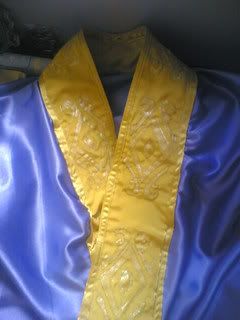
managed to sew on the embroidery piece to the collar:
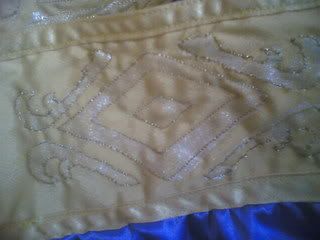

Photobucket


Photobucket


and the sleeves.


Photobucket


it looks easy but because my estimation wasn't accurate and the cloth kept getting flopped (whatever that means), i had to unsew and resew a couple of time so it won't look so scrunged. and of cos, adding the buttons. the back of the lining looks horrible. maybe i'll treat it as a pocket.
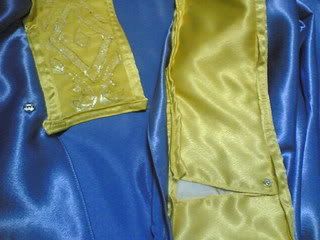

Photobucket


then i went to fix my horribly underestimated obi by addding extensions. it looks pretty good now. i realised the underside is stitched on by the bobbin color, so you could actually have 2 different color on the front and back. stupid me, should have used it for my top. the troublesome part was changing the colors.

Photobucket


and i realised it was so messy (the back) so i had to cover it up. heh.

Photobucket


the last step was just adding buttons to it.

Photobucket


Photobucket


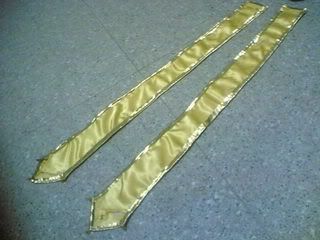
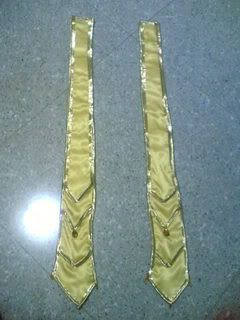
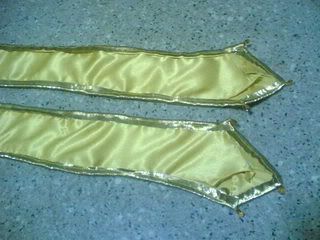
yesterday, i worked on the 2 golden strips. i had a horrible time unsewing ALL the gold lining at the side and sewing them again. this time, i unsewed it whenever the cloth flipped at the back or the layers doesn't sew well together. spent about 3+ hours just sewing the sides.

Photobucket


the back.


Photobucket


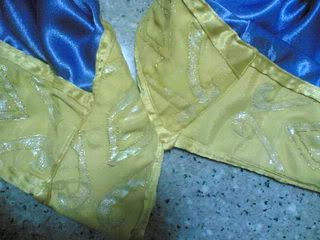
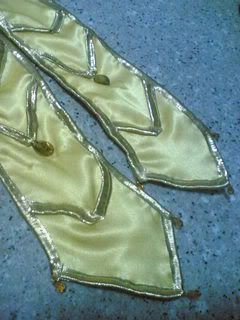
the tip of the back, which looks really awful because i underestimated the triangle section and the length.

Photobucket


and my swarovski crystals on it! pretty!

Photobucket

Tuesday, March 11, 2008

oh ya and one more...

lulubell d'gray man

jacket: $10
blue satin tie: $5
golden bells: $0.50 x 2 = $1
blue cotton ribbons: $1.50
gloves: $2/pair
formal shoes: $25
haircut: $8
golden contacts: $35

total: $88.50

reflections/stuff learnt
did my first photoshoot for this one... and my, the picture shows EVERY detail. and i realised for the first time, how my white hairs stuck out like wires. it was horrible. i realised the need for perfection after this, because up close, no matter how minute, you can tell whether the person has really taken care of the littlest detail. especially for characters that look simple enough, it makes the effort to be detailed. yeah, down to the shoes she wore.
gwendolyn odin sphere

how can i miss this one out...?

white satin: $4/m x 1 = $4
blue satin: $4/m x 1 = $4
black velvet: $2.50/m x 2 = $5
black satin: $4/m x $1 = $4
white under-netting: $1.50/m x 2 = $3
black ribbon: $2 per roll
black feathers: $2.50
blue feathers: $2.50
hair clips: $1.50 x 2 = $3
silver wig: $65
silver wig (taobao) + wig brush/conditioner/stand: $59.97
nail glue: $2
nail sticker: $2
rhinestones: $3.50
stone picker: $2.50
blue folders: $0.60x2 + $1 = $2.20
black folders: $1.30*2 = $2.60

total: $169.77

reflections/lessons learnt
how to create a flouncy skirt using the mesh netting underneath.
how to create gathers.
probably the first costume i've tried to have seams.
how to make a corset using templates. or rather, using templates.
using hair pins for hair ornaments.
bought my very first wig for this... and tried to cut it. you know, fake hair don't regrow, have to be seriously careful and always OVERestimate.
kureha shining wind

orange cloth: $2.50/m x 3 = $7.50
brown cloth: $2.50/m x 1 = $2.50
beige cloth: $2.50/m x 1 = $2.50
brown ribbon: $5 per roll
white boots: $35
satin hairband: $2
white bow strings: $2
jade earrings: $3
green pearl earring: $3
body tape: $13.90
masking tape: $1.50 x 2rolls = $3
brown long wig (taobao): $33.46
white applique: $1.20 x 2m = $2.40
white 18inch zips: $0.70*2 = $1.40

total: $116.66

reflection/lessons learnt
i've tried to create a bow but it was so flimsy. i guess my weapon making skills aren't there yet.
i bought body tapes so my top wouldn't drop out or anything, haven't tried using it though...
seams for the zigzag pattern under the skirt.
folding in of cloth for the petal pattern to keep the threads from loosing.
the skirt is too damn revealing. especially cos of the flounce. gahhh.
byakuya bleach

black cloth: $2.50 x 4 = $10
white cloth: $2.50 x 4 = $20
straw sandals: $10
bokken: $35
filmblood (100ml): $19.80

total: $94.80

reflections/lessons learnt
i used scrap cloth for the scarf (some of it actually had patterns so i took extra care to not get those patterned parts caught on camera.
used pins for the keisenkan, worked quite well.
perhaps i really need make up to accentuate the male features.
my inner cloak showed my horrible white stitches! had to redo the whole set.
sewing the patterns is hard work.
rhode kamelot

white cloth: $1 (had it long ago and only needed it for a very small part
striped socks: $5 (owned it long ago anyway...)
pink umbrella: $1.50 (what a steal)
blue hair spray: $7

total: $14.50

reflections/lessons learnt
cosplay below $20! can you believe it. a lot of pre-owned items did the trick (skirt, top), so i won't count them as prop costs...
first time using hair spray, made my hair all hard. and i wasn't able to spike it. was really disastrous since rhode has to have a spiked head.
didn't want to ruin my top so i attached the zigzag patterns to it instead of cutting. shows in photographs. oh well.
not bad for a newspaper+masking tape stuffed pumpkin, but still chui.
misa death note

dress: RM60 = $30 (about there)
stockings: $1.50 x 2 = $3
velvet choker: $1.50
cross necklace: $3

total: $37.50

reflections/lessons learnt
one of the very 'fei' and easy cosplays of mine.
nothing better than a dress bought to put on (than my self made ones of course...)
i look super short in my photos.
i ate the apple i was using afterwards. (ok, yuck, but i learnt not to waste you know)
alucard hellsing

red cloth: $4/m x 2 = $8
corrugated board: $2
brown contacts: $20 (closest i could find then...)
gloves: $2

total: $32

reflections/lessons learnt
wahahahah is one of my cheaper cosplays. the rest were all pre-owned items like the vest, pants, boots. even the gun was made from a piece of corrugated board i owned, but let's just put the rough value at that. anyway i thought i've put quite a lot of newspapapers stacked in between but the gun still looks horribly flat.
drew the pentagram on my gloves, turned out well, but was destroyed after washing. spent so much time to drew it...
learnt how to put on contacts!! and red contacts cannot be bought locally.
used a wasted cap and corrugated board for the hat. used A LOT of glue for it, seems like it doesn't really stick well. and the collar doesn't stand... (well i've just discovered the material for it!)
might as well recall the materials and amount i spent on other cosplays. starting with the oldest:

rinoa
blue lined cloth: $4 x 2 = $8
dark blue cloth: $4 x 1 = $4
metal studs: $4 (3 pieces)
boots: $25
necklace & rings: $10
blue lining: $0.90x3packet = $2.70
black zips: $1 (2pcs)
black and gold hairspray: $2
brown perm marker: $2.45
repair boots: $12

all are rough estimates since i can't remember clearly, but should be close enough.

total: $72.15

reflections/lessons learnt
hmmm my very first cosplay! wasn't that bad! if you can't paint the pattern, sew the pattern... what i did for the wings on the cloak. it's important to get the correct fabric, and not use things like jean skirt for her skirt (which is not jeans material). maybe i should get a weapon next. i didn't do her streaks... nor put any make up.

Friday, March 07, 2008

i am so pissed.
i just realised my obi is too short. alright i have a huge ass and i underestimated. that is the worst thing to do for tailoring. especially since i have to resew all the gold trims and stuff. sighss. or should i just split them in half and add cloths. hope it won't look too messy. and i'm still quite clueless about my embroidery. perhaps i'll try pattern drawing on a tracing paper, then sewing on that tracing paper since it can be easily torn away...
oh well. finally added on the collar and sleeves yesterday to my inner top. where i have understimated the length of my sleeves as well and had to add extra cloth. oh well, luckily i bought extra white satin...


Photobucket


Photobucket


Photobucket


now i have my hugie sleeves, yayyy

Thursday, March 06, 2008

so i worked super hard and chionged the costume.
i swear i'm getting good in this type of top. (-_-`) finished it in 1 hour.
here's the inner top. the outer top is still missing one sleeve cos of my stupid colour blunder.


Photobucket


and then the inner skirt with the satin trails.


Photobucket


the outer skirt (light lilac). i may need to mend the trims.


Photobucket


stitched a zip on top. first time my skirt is made from a template... and actually looks like a skirt because of the cutting. AND fits my waist (it's usually toooo big).


Photobucket


my favourite! the obi. originally supposed to look like this:


Photobucket


Photobucket


and my half completed version with the gold trims!


Photobucket


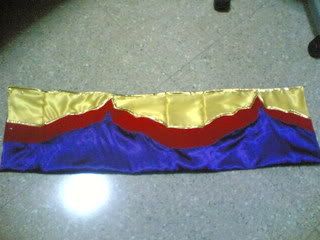
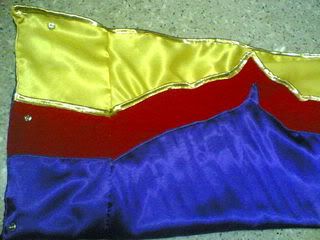
added on the dark hard purple portion. realised my red was too short. so i cheated a little. gahh why does my cheat look so obvious even in this pixelated picture. :(


Photobucket


this tricolor flap is infront of the skirt. still missing the clouds.


Photobucket

probably gonna mend the sides so it looks more... hmmm straight? and this is the 2 golden strips that's supposed to be in front of the triclour flap. ok, it's a little 'wai1' but i tried my best. the ribbon is really hard to stitch on and it keeps de-weaving (whatever you call it...). so irritating. but i guess it shouldn't look too bad when pieced together. heh. it's still incomplete without the crystals and there's supposed to be another thin arrowed lining.


Photobucket


ok i should get back to work. my boss says he is giving me the highest salary amongst all his employees. wheeps. shouldn't slack too much eh. or maybe he was just making me guilty. baka.
this must be my biggest project yet...
recently got addicted to saiunkoku monogatari (colourcloud palace). their costumes are simply gorgeous! am going to work on the emperor robes for one of my favourite characters, shi ryuuki. here's how he looks like in his emperor robes:


Photobucket

Photobucket

Tuesday, February 26, 2008

and the final piece for my gwendolyn outfit, the feather head-dress.


Photobucket


i hope it doesn't' fall all over the place later on. my only worry is how i can clip it on... the wig. haha.